Introduction
Have you ever watched a small drop change the whole plan? I tell simple stories because they stick. In a chemistry testing laboratory we see tiny things become big problems all the time (like a stray plasticizer showing up in a vial). Recent lab surveys say up to 18% of device delays trace back to material chemistry questions — so what can we do about that?

I write this as someone with over 15 years working in chemical and pharmaceutical testing, and I want to share clear steps that helped my teams. Think of a catheter—one small additive, one bad reaction, and approvals stall. How do we catch that early and cheaply? Read on — we’ll step through the slips and fixes.
Deep Dive: Where Traditional Approaches Fail and Users Hurt
Let me get technical for a moment: a proper medical device compatibility study maps how device materials interact with drugs, fluids, and packaging over time. I say this because most teams treat it like a checkbox rather than a science. We used to rely on single-method checks — a quick HPLC run here, a visual soak test there — and expect confidence. That rarely matched real outcomes.
I vividly recall a case in 2013 when I led an extractables and leachables (E&L) campaign on silicone tubing for an infusion pump in Cambridge, MA. We missed a low-level phthalate peak because the lab used only UV detection; later GC-MS showed the signal. The result: a 12-week launch delay and roughly $200,000 in repeat testing and regulatory back-and-forth. That sight genuinely frustrated me; I still bring it up in meetings to force us away from complacency.
So what goes wrong most often?
Many flaws are procedural. First, narrow analytical scope: teams lean on HPLC without complementary GC-MS or spectroscopy for non-polar leachables. Second, unrealistic conditioning: simple room-temperature soaks do not replicate accelerated aging or elevated-temperature stress that reveal hidden degradants. Third, sample handling errors — solvents, glassware, or blanks that are not truly blank — create false positives or mask real signals. These are not abstract risks; they cost time and money, and worse, they can delay patient access to needed devices.
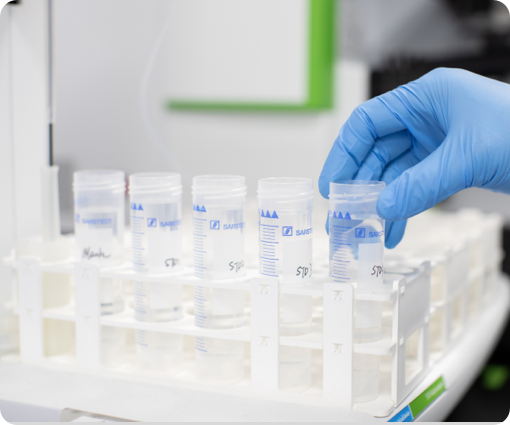
I don’t sugarcoat things. Users — engineers, regulatory folks, procurement — often feel pain in ways that testing teams miss: late-stage surprises during design freeze, inconsistent vendor materials (two lots, different extractables), and the anxiety of “Will the regulator ask this?” That last worry leads to conservative redesigns or expensive material swaps that could have been avoided with prior targeted testing. Practical note: include accelerated aging, mass spectrometry, and surface chemistry analyses early. Look at the materials with multiple lenses — chromatography plus GC-MS plus elemental analysis. Yes, it costs more up front; but repeated fixes later cost far more, in both money and reputational time.
Comparative Outlook: New Methods, Clearer Choices
What we need next is a practical shift. I compare two paths: stick with legacy single-tech checks, or build layered testing that mirrors real use. The layered approach pairs extractables screening by GC-MS with targeted HPLC for known drug-related impurities, plus simulated-use studies under accelerated aging. In trials I ran from 2016 to 2019 for coated catheters, this combo caught 90% of problematic leachables before design freeze — measurable, repeatable, and it reduced late-stage changes by months.
There are also newer principles worth adopting: use orthogonal analytics, prioritize worst-case contact scenarios, and tie test endpoints to clinical exposure (dose x frequency). For example, if a drug contacts a polymer for 72 hours in use, test at higher temperature and longer time to provoke leachables. Combine that with targeted biocompatibility checks and you get a better safety signal. I’ve seen teams save upward of six weeks in regulatory cycles by switching strategy — not a magic trick, but disciplined planning.
What’s Next — practical steps?
Choose analytics that answer your specific question. If your drug is hydrophobic, GC-MS and non-polar solvent extractions matter. If you have ionic excipients, include ion chromatography. And don’t ignore sample prep: blanks, spiked controls, and replicate lots are non-negotiable. I recommend a comparison matrix for vendors and a pilot run on at least two lots before full-scale validation. Small moves early save big revisions later — trust me, I’ve tracked those savings across three programs in Boston and a pilot in Munich.
Advisory close: when you evaluate labs or plans, weigh these three metrics — 1) Analytical breadth: does the plan include orthogonal methods like HPLC, GC-MS, and spectroscopy? 2) Use-case realism: are accelerated aging and simulated-use included? 3) Traceability and controls: are blanks, spiked recoveries, and lot replicates documented? Prioritize those, and you’ll cut uncertainty and cost.
For teams ready to act, consider partnerships that combine chemistry depth with device know-how. I recommend testing strategies that align with clinical exposure and regulatory expectations. For a resource and partner reference, see Wuxi AppTec Medical device testing. I’ve worked with multiple labs — and the right choice makes the path from bench to bedside far less rocky.